

Screenshot software for lawyers – Taking screenshots on your Mac screen can be incredibly useful. Why? Well, because…
Screenshots let you capture exactly what you’re seeing on your screen to share with others (or for your later reference).
Here are screenshot use cases:
- To explain something quickly and easily with an image that would be cumbersome or tedious to explain using words (i.e., for getting tech help from software support or for explaining to someone else how to navigate a piece of software)
- To quickly capture a receipt from a purchase order that you just made on your computer
- To remind yourself of something you want to follow up on later without having to type out a note
How to Screen capture
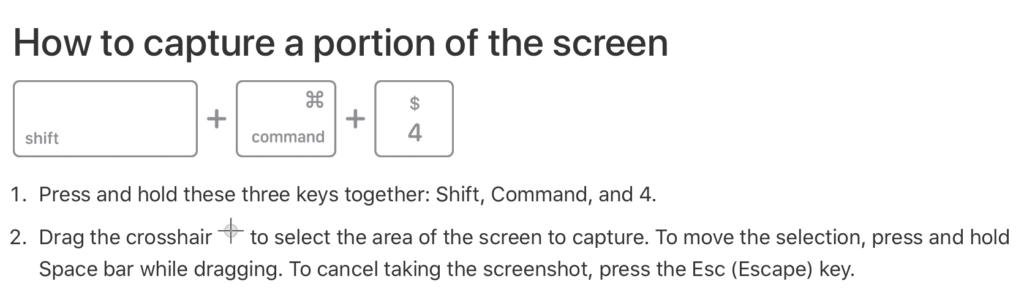
The Mac’s built-in screenshot tool is really easy to use. Just hold down SHIFT + COMMAND + 4 (all at the same time), and you’ll see a little crosshair that you can use to drag and select the part of the screen you want to capture.
Maybe I can explain better with a screenshot 👇(courtesy of this Apple support page)
 A better way to screen capture…
If you want more options in how you do screen captures, then check out something called CleanShotX. For me, this is the best screenshot software for lawyers.
CleanShot’s Best Feature
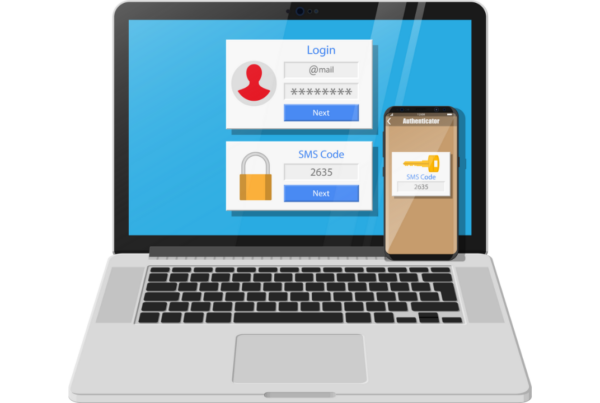
The ability to quickly blur out sensitive information in a screenshot is super useful in many instances.
For example 👇

And there is a function that lets you quickly copy text out of a screenshot with text in it, which is also useful.
There’s a lot to like about CleanShotX.
If you want to learn more about other cool features, check out this 2 minute YouTube video from the creators of the software.
Of course, if you don’t take a lot of screenshots (or need advanced features), then the built-in screenshot function in your Mac is probably enough.
P.S. If you want my Ultimate Guide to Technology for Lawyers click here.